How to Improve Room Acoustics and Studio Monitor Placement

Monitor calibration helps greatly but may not be fully sufficient to resolve all room acoustic problems. Audio monitoring rooms generally need suitable acoustic treatment to enable the highest quality monitoring. This section outlines ways to improve room acoustics, however, we always strongly recommend consulting with a professional acoustician.
Wall surfaces, ceilings, furniture and floors can reflect, diffuse or absorb audio. Combinations of these acoustic effects are often used in treatment.
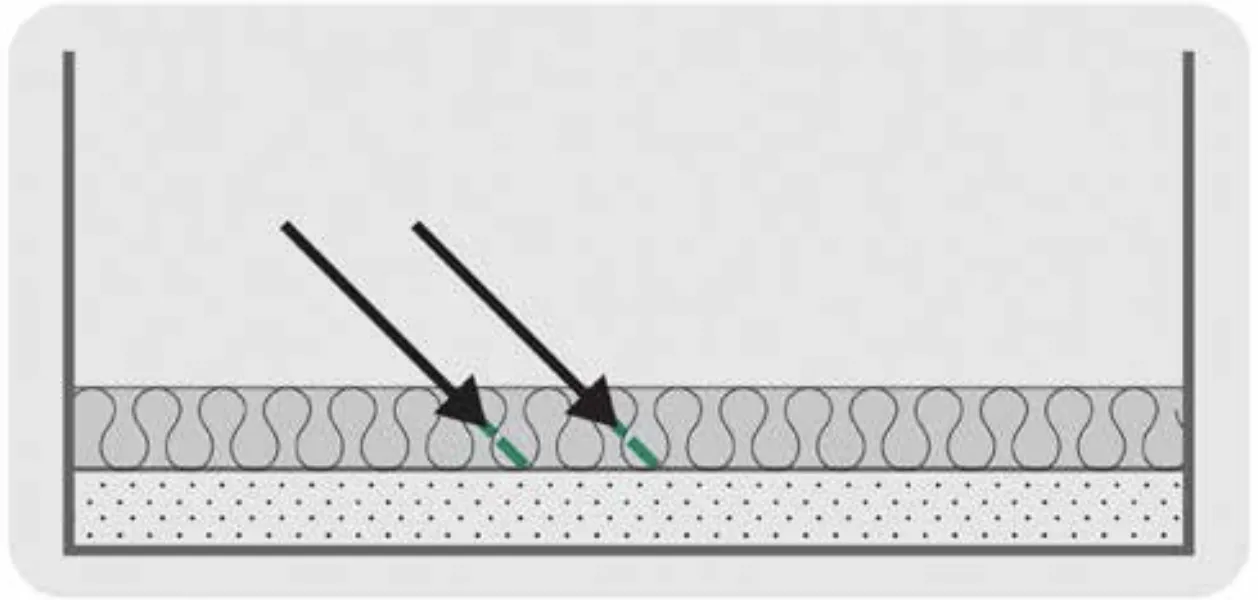
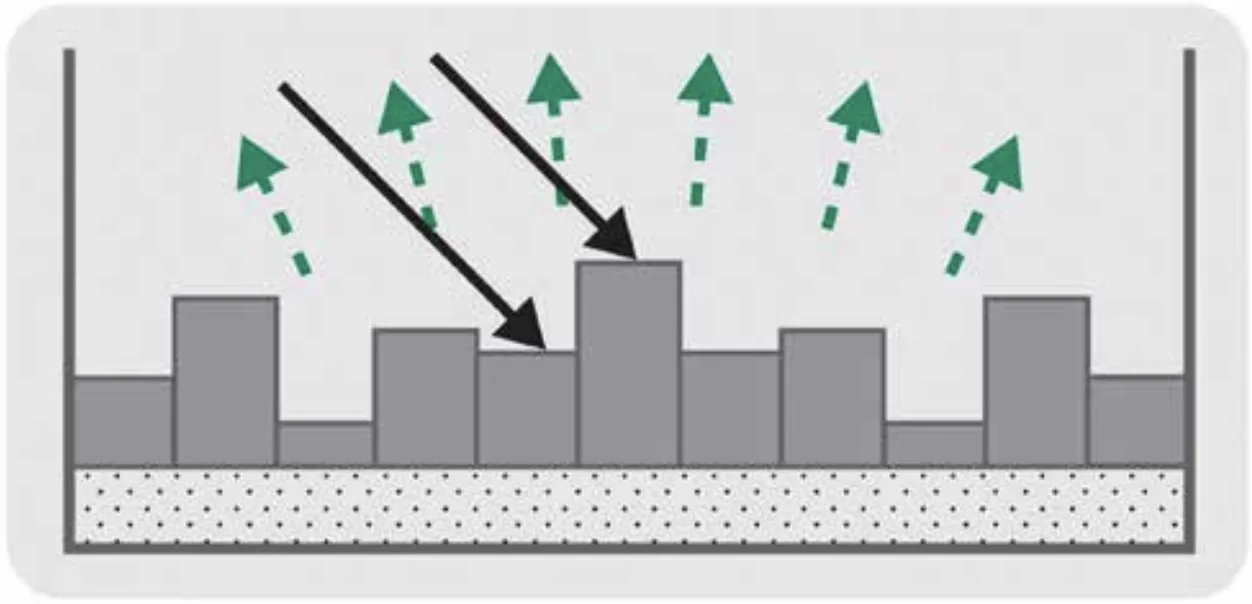
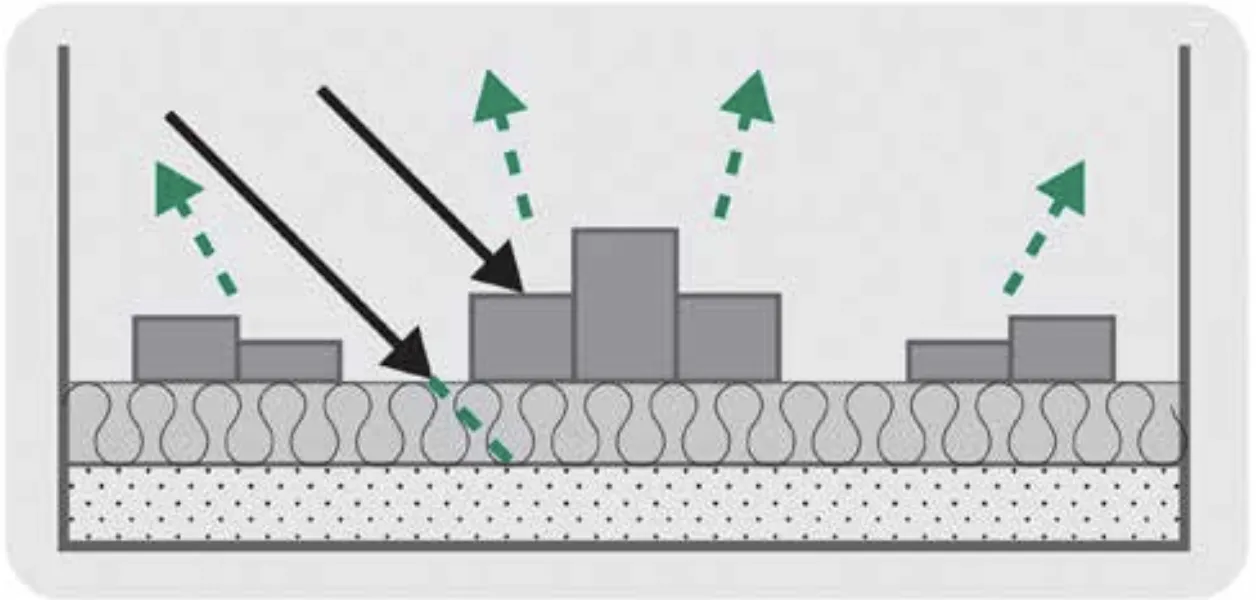
Room acoustic improvements
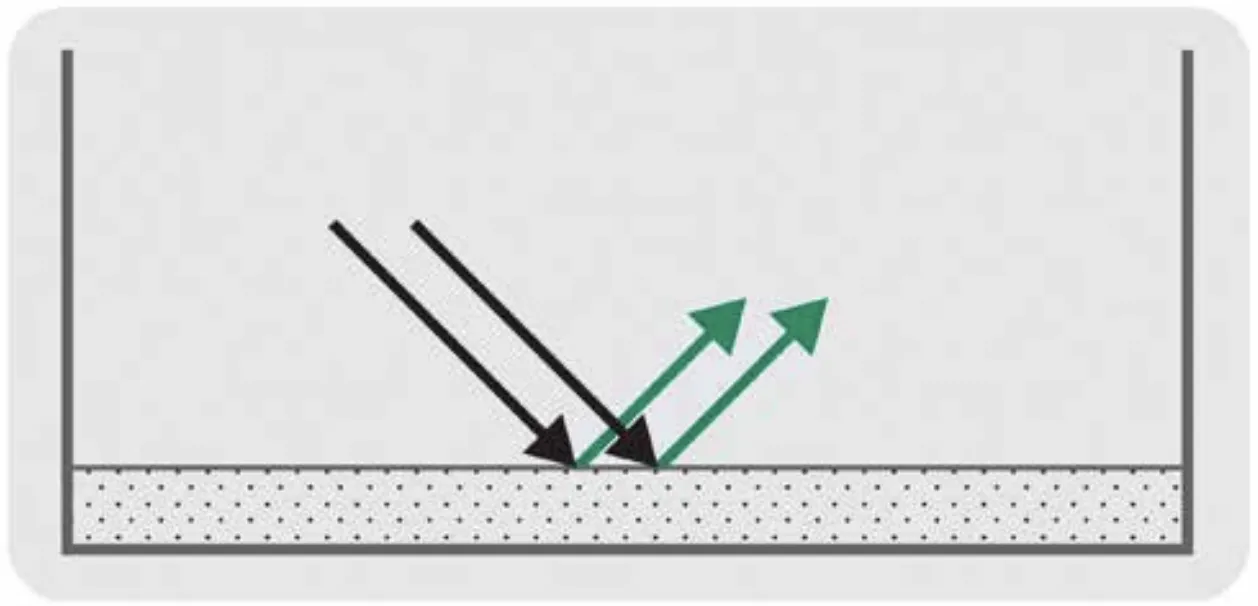
Reflections arriving soon after direct sound are called early reflections. These first reflections can have a high level, while subsequent reflections will become quieter. Ideal control room design guides the first reflections away from the listening area, preventing early reflections from reaching the listening area.
Acoustic improvements in the monitoring room can make monitoring more accurate. In a small room (less than 25–30 m² of floor area), absorption is usually the primary need, and diffusion is usually less beneficial.
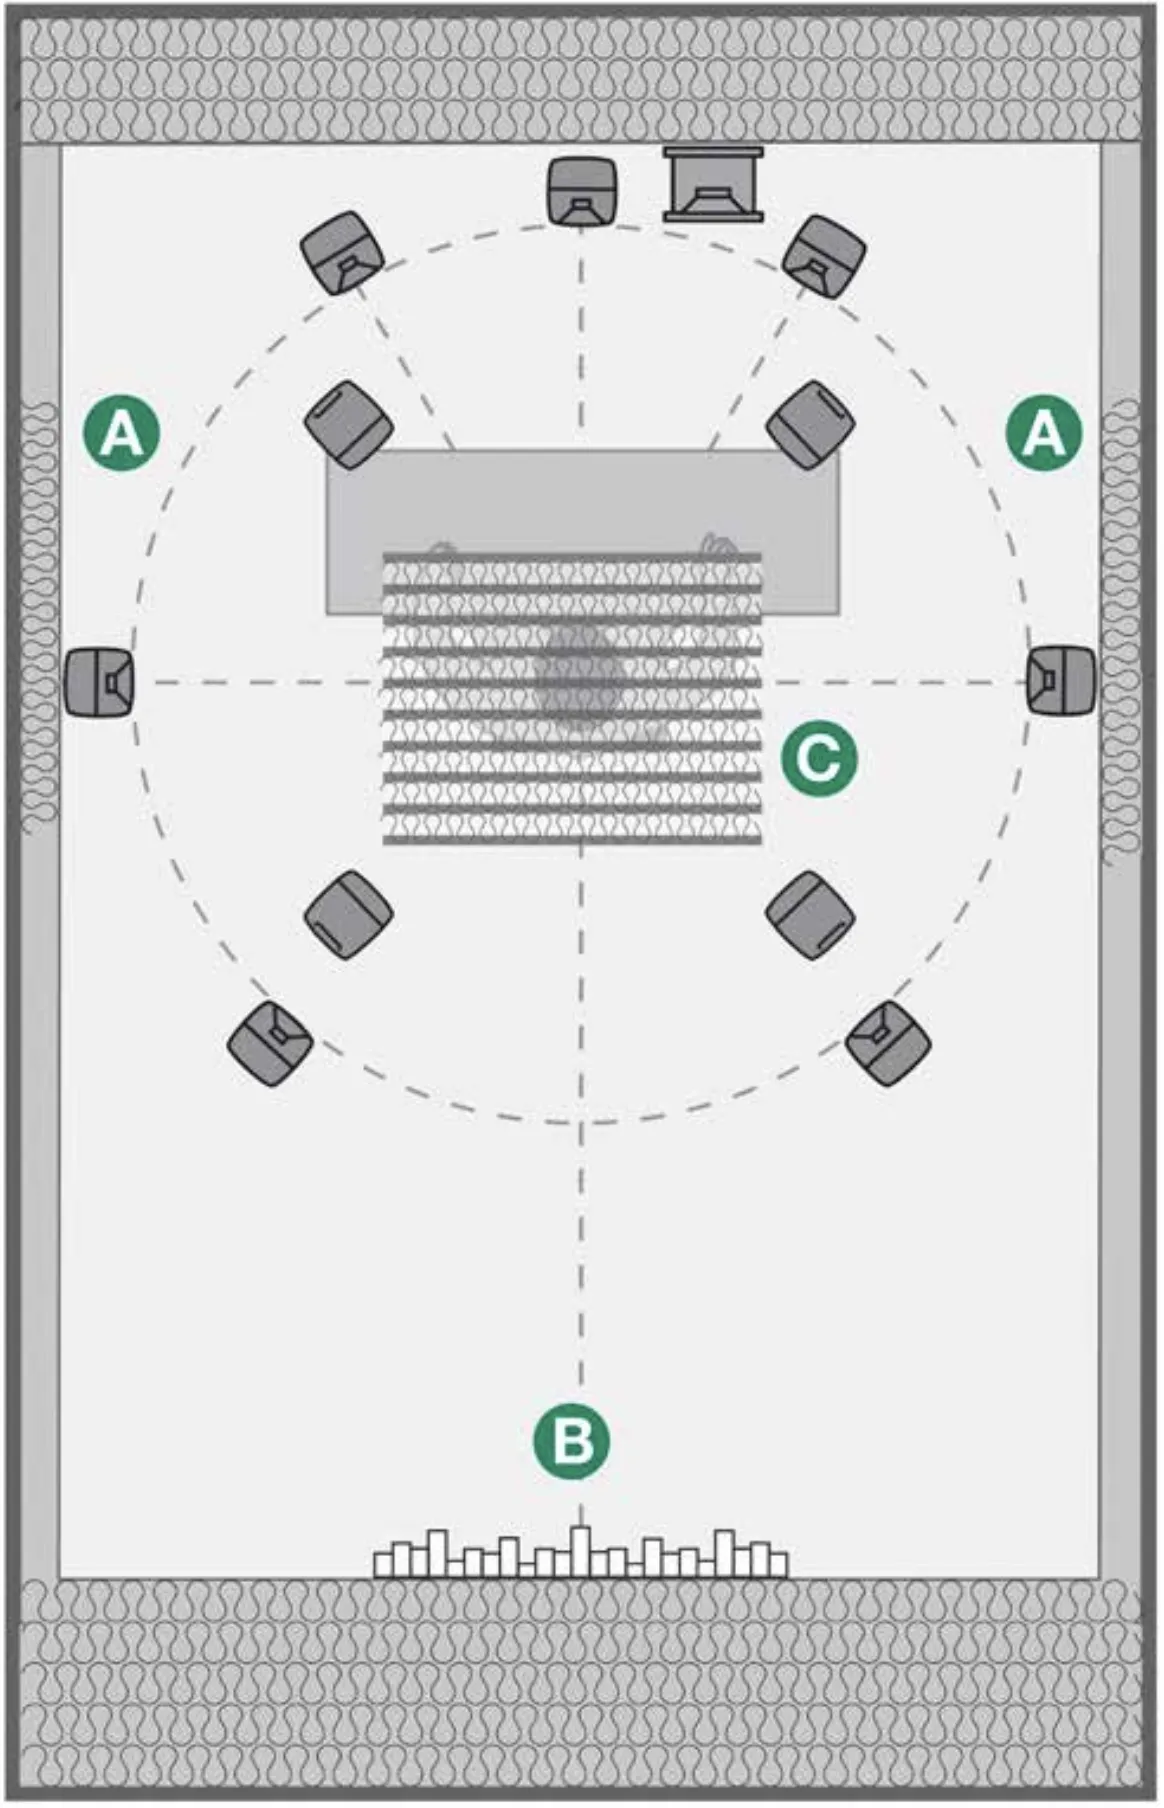
B) If the room is large enough, use diffusive and absorbing elements on the back wall.
C) Use a combination of absorption and diffusion above the listening area to reduce acoustic reflections from the ceiling.
Boundary effects and wall placement
Sound reflecting from the wall behind a monitor is significant at low frequencies. Reflected sound can cancel woofer output, making the bass output appear too quiet or even missing.
To avoid this, push the monitors close to the back wall. The distance measured from the monitor front to the wall behind the monitor should preferably be less than 0.6 metres (2 ft) to eliminate low frequency cancellation. However, a monitor needs a minimum clearance of 50 mm (2 in) to the wall to ensure full output from a rear bass reflex port. Alternatively, pull the monitor sufficiently far from the wall, making the wall reflections so dense in frequency and low in level as to reduce the effect of the reflections.
All acoustic reflections from the wall located behind the loudspeaker can be eliminated
by creating an acoustically sealed recess in the wall and installing the monitor in the recess so that the monitor front baffle is flush with the wall. This method is called flush mounting.
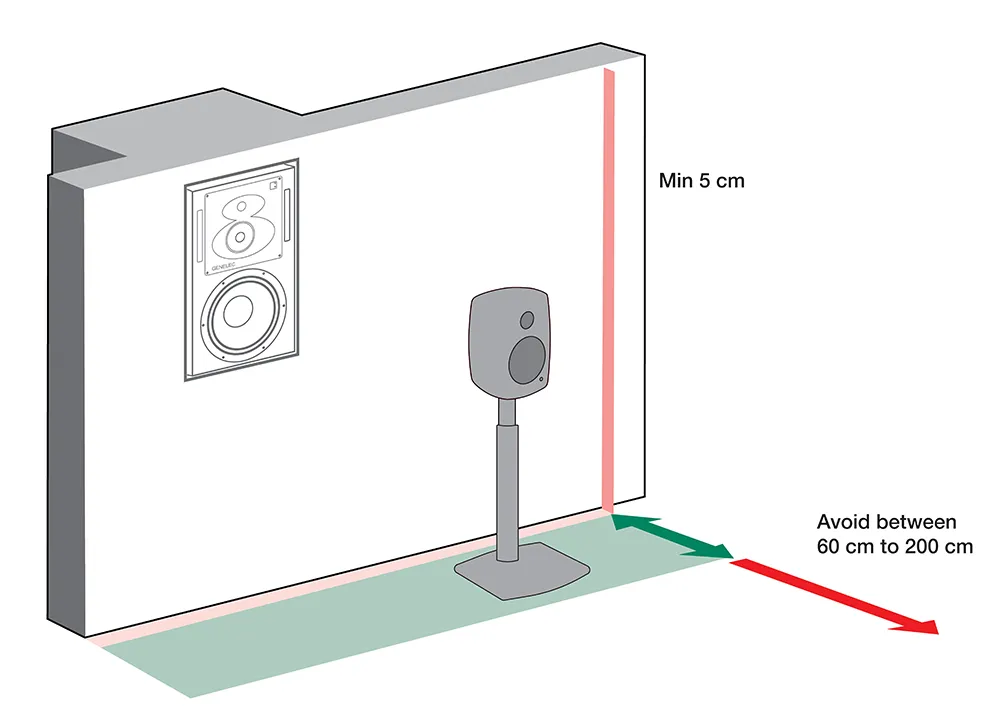
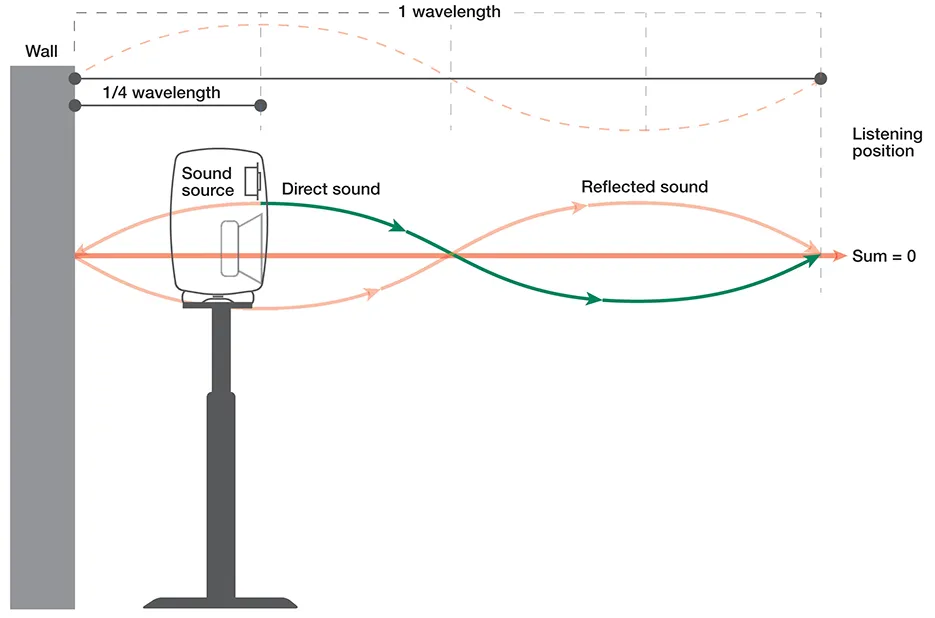
When there is some distance between the monitor and the wall, sound takes some time to travel to the wall and then back to the monitor. At the frequency where this total distance is equal to one quarter of the sound wavelength, the reflection is out of phase with the sound output of the monitor – and reflected audio cancels the audio from the monitor, reducing the monitor output.
At this frequency, the sound level is reduced. How much level reduction occurs depends on how much sound the wall reflects. Note that cancellation will also happen at higher frequencies where reflected sound is out of phase with the sound output of the monitor.
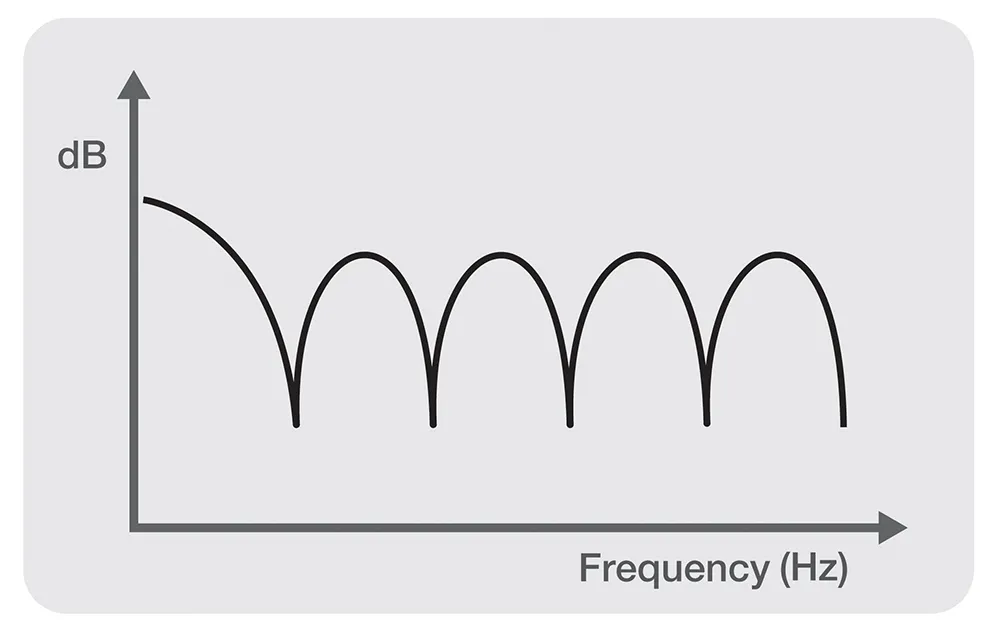
Wall reflections can generate a set of cancellations at multiple frequencies (often called comb filtering). Equalisation of the monitor does not help here, because the level of reflected sound is related to the output of the loudspeaker. If the loudspeaker output level changes, the reflected sound level also changes.
Wall reflections can be eliminated by flush mounting the monitor within the wall, which extends the front baffle of the monitor. Flush mounting requires creating an acoustically sealed recess in the wall and installing the monitor in this recess so that the monitor front baffle is flush with the wall. Remember that low-frequency boost should be compensated for when the monitor is flush mounted.
Another solution is to place the monitor very close to the wall. This raises the lowest frequency of the cancellation such that the monitor has already become forwarddirecting, preventing the cancellation from occurring. Remember that low-frequency boost should be compensated for when the monitor is mounted close to the wall.
Another possible solution is to move the monitor to a considerable distance from the wall. This moves the cancellation frequencies down, making cancellations dense and narrowband, so that the lowest cancellation frequency falls below the cut-off of the monitor. In addition, when the monitor is moved away from the walls, it also moves closer to the listener, increasing direct sound level and reducing reflected sound level.
Yet another solution is to modify the wall and make it very absorptive. The amplitude of the reflected sound becomes small and does not cancel direct sound significantly anymore. Please note that absorbing low frequencies efficiently may require substantial absorbents.
Boundary loading in room
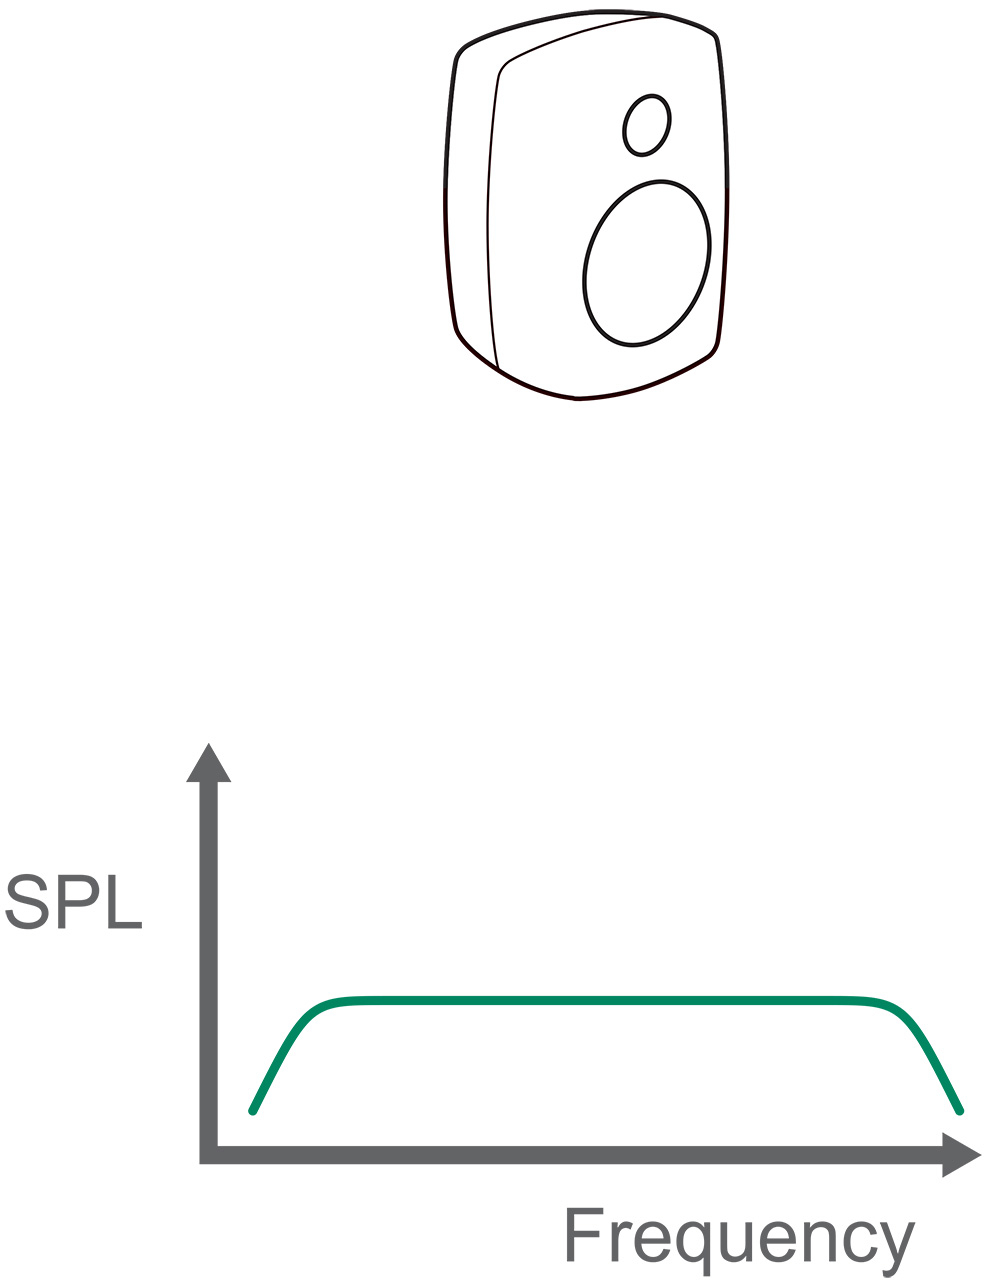
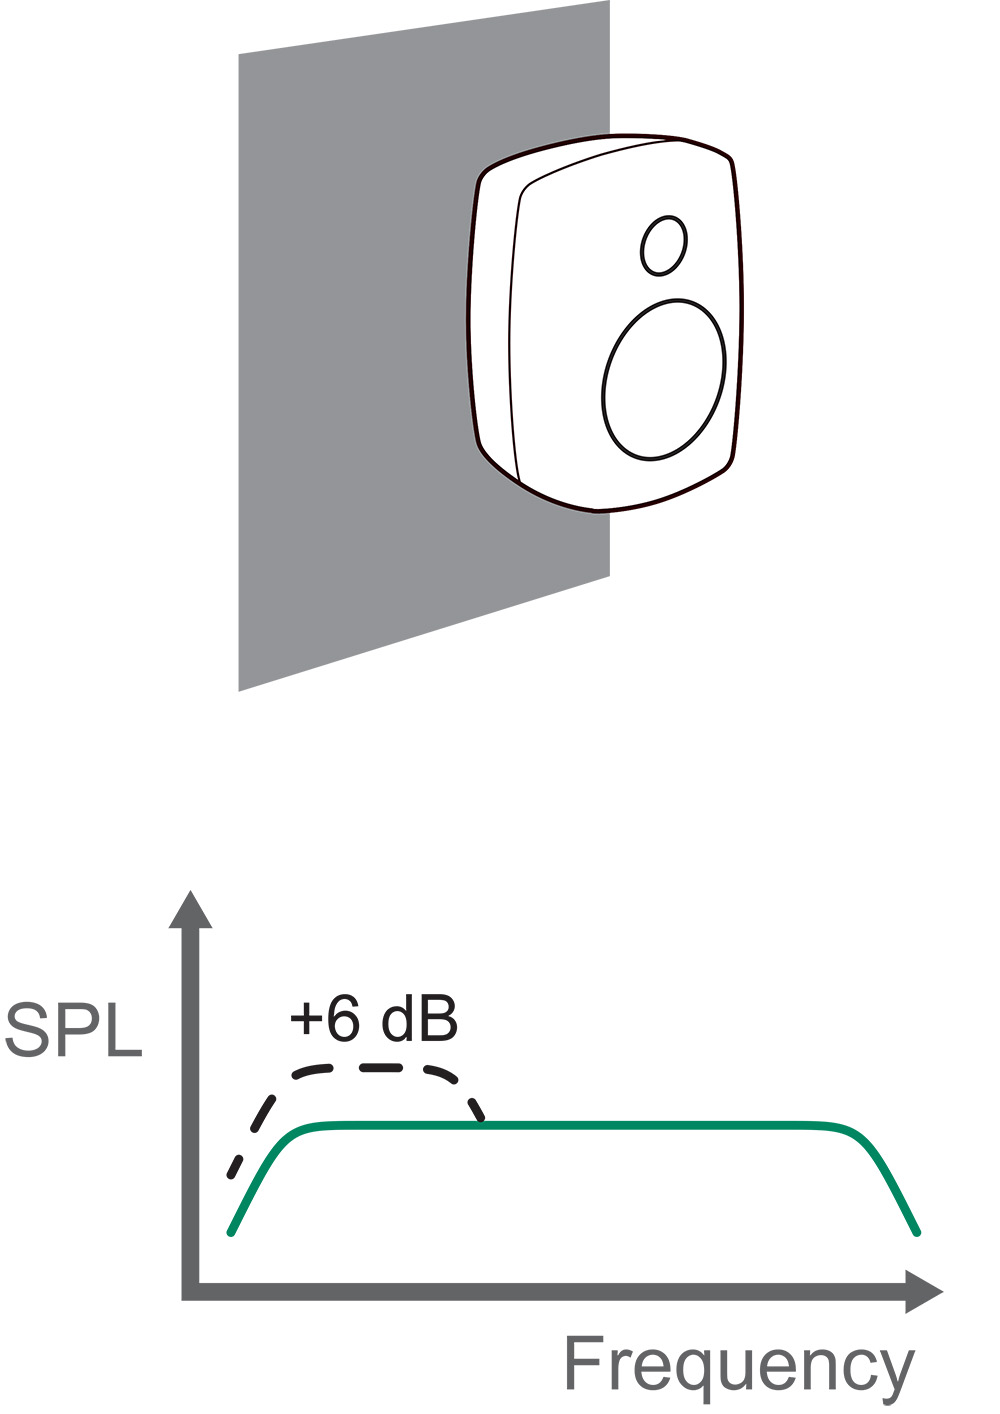
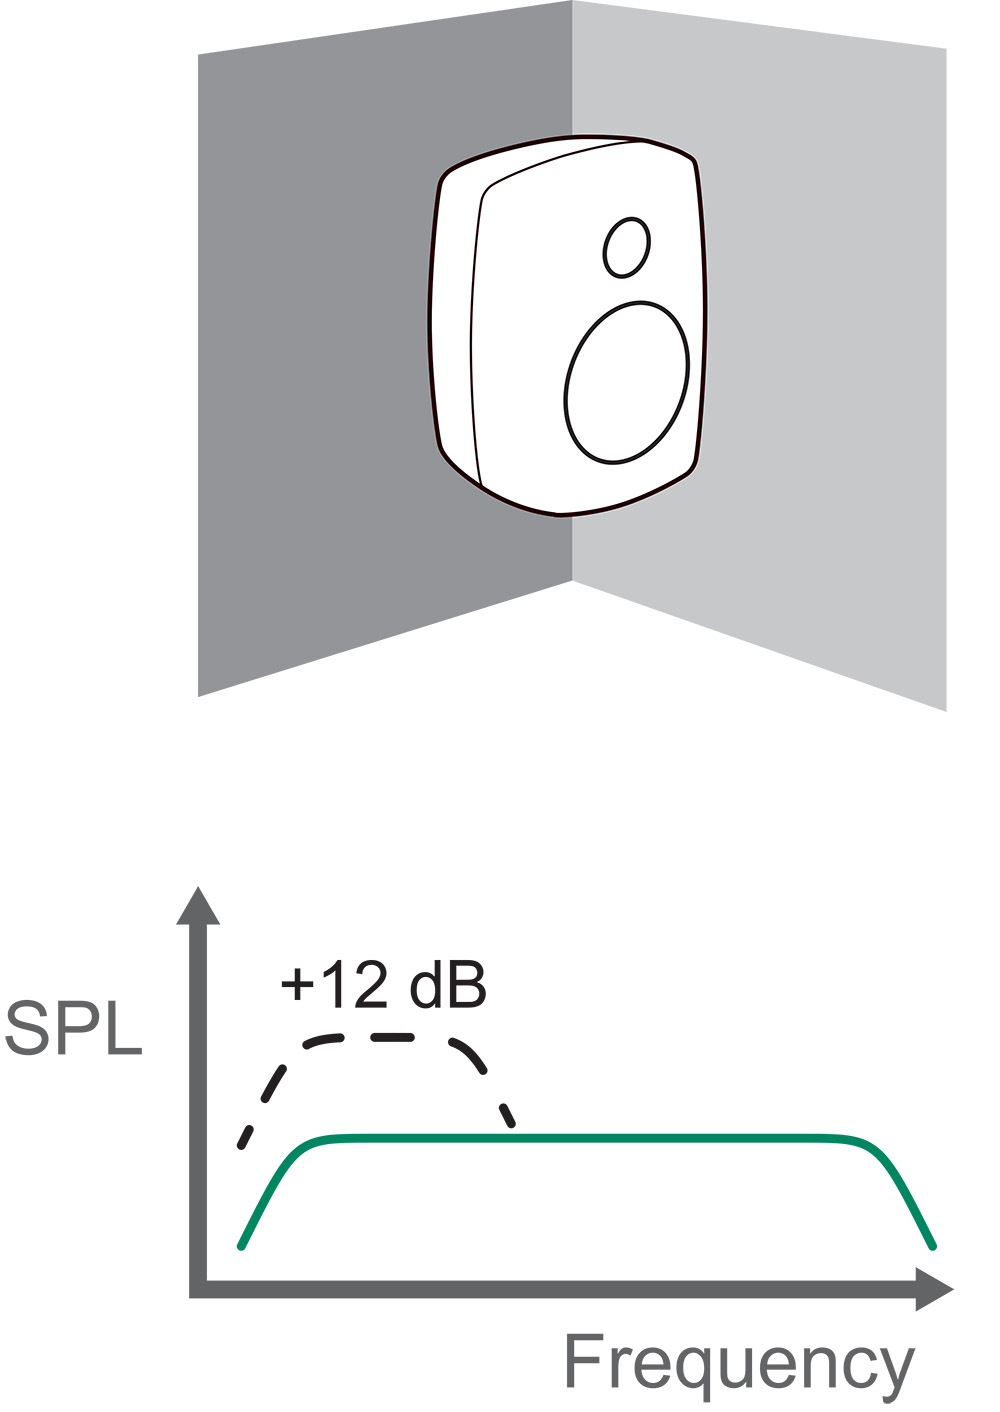
A monitor radiates low-frequency sound in all directions. Because of this, sound level increases when sound radiation is limited by nearby walls. Every additional wall close to the monitor doubles the sound pressure level. A monitor with a free-space (no walls) flat frequency response produces 6 dB more level at bass frequencies when placed against a wall. In a corner (two walls), this wall gain can increase to 12 dB. Having three close boundaries (e.g. in a corner by the ceiling), the gain can increase up to 18 dB.